Creating augmented reality (AR) filters and experiences can seem overwhelming at first. Yet, with a clear roadmap, anyone with passion and curiosity can master the art of AR creation. Whether you are just starting out or looking to refine your skills, understanding the step-by-step process is key to turning your ideas into reality. This guide will walk you through the complete AR creation roadmap, helping you navigate from initial concept to published project with confidence.
This AR creation roadmap breaks down the process into clear phases that guide aspiring developers from idea generation to publishing. By following these steps, you can systematically learn, develop, test, and share your AR filters and experiences, building your skills and portfolio along the way.
Understanding the AR creation journey
The first step in any AR project is understanding what you want to create and the platforms you’ll use. AR creation involves designing visual assets, coding interactions, and deploying your work on social media or web platforms. Your goal might be a face filter on Instagram, a world effect on Snapchat, or an interactive WebAR experience for a website. Recognizing the different types of AR and their best use cases helps shape your learning path.
Building your foundation: skills and tools
Before diving into development, it’s essential to acquire foundational skills. These include understanding basic design principles, familiarizing yourself with AR-specific concepts like tracking and anchoring, and learning about popular AR platforms. You can start with beginner-friendly tools like Spark AR Studio for Instagram filters or Lens Studio for Snapchat. Both platforms offer free resources and tutorials that walk you through the creation process.
Key skills to develop
- Basic graphic design and animation
- Understanding 3D modeling concepts
- Familiarity with scripting concepts
- Knowledge of platform-specific features
Essential tools and software
- Spark AR Studio for Instagram filters
- Lens Studio for Snapchat lenses
- Effect House for TikTok effects
- WebAR builders like 8th Wall or ZapWorks for browser-based AR
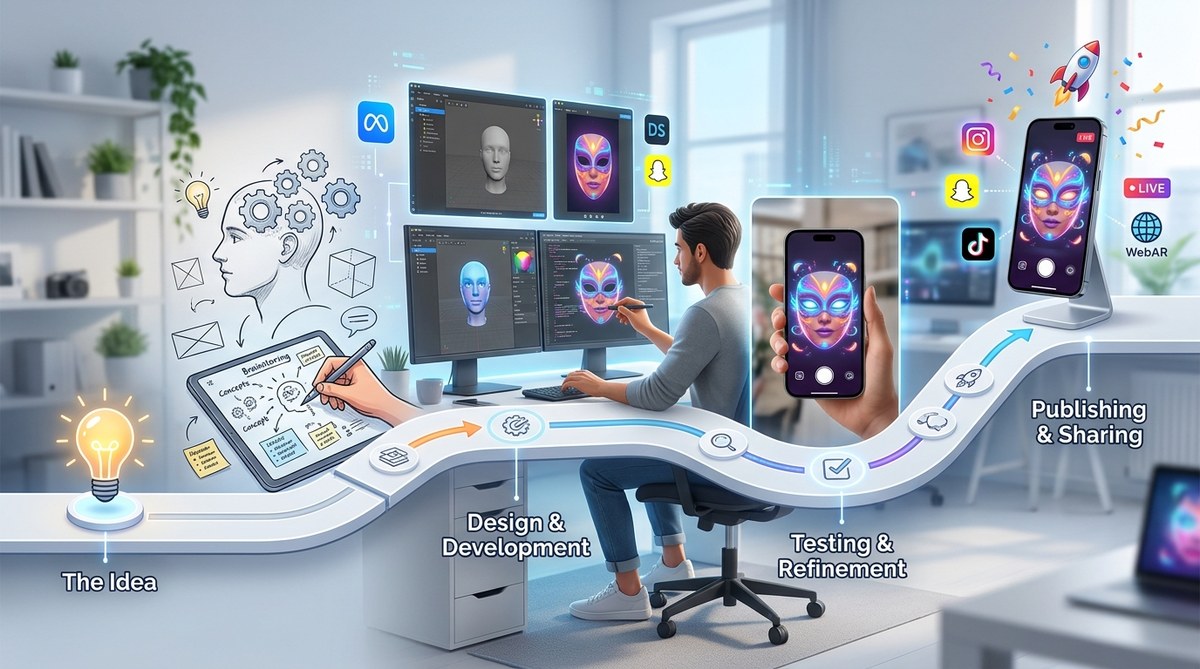
Step-by-step AR creation roadmap
Follow this structured process to develop your first AR project or refine existing skills.
1. Conceptualize your idea
Start by defining what kind of AR experience you want to create. Ask yourself:
- Who is your target audience?
- What is the core interaction or effect?
- Which platform suits your idea best?
- What assets will you need?
Create sketches or mood boards to visualize your concept. For example, designing a face filter that adds fun hats or transforming a product showcase into an interactive experience.
2. Choose the right platform and technology
Select the platform based on your target audience and project goals. For social media filters, Spark AR Studio and Effect House are popular choices. For web-based experiences, WebAR tools like 8th Wall offer more flexibility.
Evaluate your technical skills:
- If you’re a beginner, start with no-code or low-code platforms.
- If you have coding experience, consider platforms that support scripting like Unity with AR Foundation or Vuforia.
3. Gather or create assets
Assets include 3D models, textures, animations, and sounds. You can source free assets from platforms like Sketchfab or create your own with tools like Blender. Remember to optimize assets for real-time rendering to ensure smooth performance.
4. Develop and script your effect
Use the platform’s interface to assemble assets, set up interactions, and fine-tune tracking. For face filters, this involves mapping effects to facial features. For world effects, it might mean placing virtual objects in the environment.
Key techniques include:
- Tracking face or environment
- Responding to user gestures
- Animating objects
- Adding effects like particles or color filters
5. Test rigorously
Testing is vital before publishing. Use platform simulators and test on actual devices to ensure compatibility and performance. Gather feedback from friends or community groups and iterate based on their input.
6. Publish and promote
Once satisfied, submit your AR effect for review on the platform. Follow their guidelines to avoid rejection. After approval, share your creation across social media channels, embed WebAR experiences into websites, or include them in marketing campaigns.
Common pitfalls and how to avoid them
| Technique | Mistake | How to fix it |
|---|---|---|
| Face tracking | Overloading effects | Optimize assets and limit effects to improve performance |
| Asset creation | Using unoptimized models | Reduce polygon count and texture size for faster load times |
| Testing | Not testing on multiple devices | Test across various hardware to ensure broad compatibility |
| Deployment | Ignoring platform guidelines | Review submission criteria carefully to prevent rejection |
Expert tip: Always keep user experience in mind. A fun, engaging AR filter or experience that loads quickly and works reliably will get shared more often.
Continuing your AR skills
As you progress, consider exploring advanced topics like spatial mapping, 3D object recognition, and multi-platform deployment. Participating in online communities and attending AR workshops can accelerate your learning. Experiment with different tools and platforms to discover what suits your style best.
Additional resources
- Tutorials for how to make your first Snapchat lens
- WebAR development guides using 8th Wall
- Advanced effect creation techniques in Effect House
Final thoughts on mastering the AR creation roadmap
Building compelling AR filters and experiences is a rewarding journey. The key is to start small, learn continuously, and iterate often. Use the wealth of tutorials, free tools, and community support available to guide your progress. As you gain confidence, you can take on more complex projects, expand your portfolio, and even monetize your skills.
Remember, every expert was once a beginner. With dedication and a clear plan, you’ll be creating captivating AR effects before you know it. Keep experimenting, stay curious, and bring your creative ideas to life in augmented reality.