Your first AR filter is going to be incredible. You download Lens Studio, Spark AR, or Effect House for zero dollars. You watch a few tutorials. Within hours you have a working prototype. The platforms encourage you: free software, free publishing, massive reach. But the phrase “free AR tools” is a little bit like “free pizza” — you still have to tip the delivery driver, and sometimes the toppings cost extra. After working with dozens of creators who started with free tools, I have seen the same patterns over and over. Budgets blow up, timelines stretch, and frustration grows. The good news? You can avoid most of these problems if you know what to look for. Let’s break down the real price tag of so-called free AR tools so you can plan smarter from day one.
Free AR creation tools hide costs in time, assets, learning, and platform fees. You may spend hundreds of hours mastering software, buying 3D models and textures, paying for cloud hosting, or dealing with rejected submissions. The true expense of “free” often exceeds a paid subscription plan when you add everything up. Plan for these costs upfront.
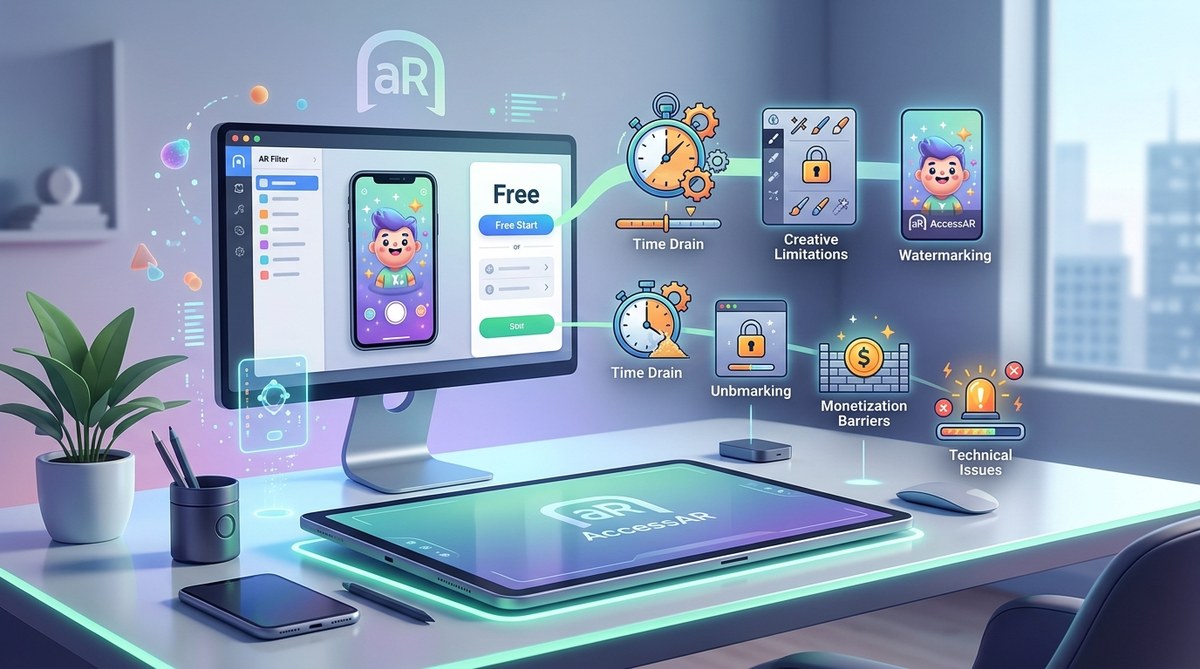
The Illusion of a $0 Price Tag
When Snapchat launched Lens Studio in 2017 and Meta followed with Spark AR, the promise was clear: anyone could build augmented reality effects without spending a dime. TikTok’s Effect House continued the trend. Today, in 2026, those platforms remain free to download and free to publish on. But creators quickly discover that the software license is only the beginning.
Think of it like getting a free coffee maker. The machine costs nothing, but you still need filters, coffee grounds, water, electricity, and the occasional descaling tablet. Over a year, those small purchases add up to more than the price of a decent drip machine. The same logic applies here. Let’s look at where your money and time actually go.
Time Is the Stealthiest Expense
The biggest hidden cost of free AR tools is your own time. Beginners often underestimate how long it takes to move from “I know which button to press” to “I can ship a professional effect that passes platform review.”
Here is a realistic timeline breakdown for a creator starting from scratch:
- Learning the interface and basics: 10 to 20 hours. You need to understand the scene panel, assets, materials, and scripting.
- Building your first simple effect: 5 to 10 hours for a basic face filter with one modification.
- Polishing and testing: 5 to 15 hours. You will find glitches, edge cases, and performance issues.
- Submission and rejection cycles: 2 to 10 hours per attempt. Platforms reject effects for unclear reasons, forcing rework.
- Iterating after launch: Ongoing. Updates, bug fixes, and responding to user feedback.
If you value your time at $30 per hour (a common freelance rate), a first effect can easily cost $600 to $1,500 in unpaid labor. That is not free by any measure.
Why Free Tools Don’t Teach You Efficiency
Free AR tools are designed to be accessible, but they are not always optimized for speed. Tutorials from the platform itself often skip over advanced workflows. Community forums are helpful but fragmented. You end up watching hours of YouTube videos or reading scattered documentation just to solve one small problem.
For a more structured approach, check out Your First AR Filter in 30 Minutes: A Complete Beginner Tutorial. It will save you the chaos of learning through trial and error.
Assets: What Happens When Free Templates Run Out
Every free AR tool ships with starter assets: a few 3D models, some textures, and basic face meshes. They work for prototypes. But when you want to create something unique or brand ready, those free assets feel limiting. You need custom 3D objects, high-res textures, sound effects, or animated characters.
Creating those assets from scratch requires additional software. Blender is free, but learning it takes weeks. Spline and Cinema 4D cost money. Or you can buy pre-made assets from marketplaces like Sketchfab, TurboSquid, or CGTrader. A single quality 3D model can run $20 to $100. If your effect needs five models, that is $100 to $500 before you even open the AR tool.
The Licensing Trap
Free assets often come with restrictive licenses. You might be allowed to use them only for non-commercial projects, or you may need to credit the original creator. Some marketplaces charge royalties if your effect goes viral. Read the fine print. Ignoring it could lead to takedown notices or legal fees later.
Platform Fees and Subscription Upgrades
Here is a table that clarifies the common fee structures across major free AR platforms in 2026:
| Platform | Initial Cost | Hidden Fee Pitfall | Typical Upsell |
|---|---|---|---|
| Snapchat Lens Studio | Free | Custom behavior scripts may require premium third-party plugins | Lens Studio Pro subscription ($20/mo) for advanced analytics and cloud resources |
| Meta Spark Studio | Free | High-resolution textures and animations increase app size; publishing limits for heavy files | Spark Studio Plus ($15/mo) unlocks larger file sizes and priority support |
| TikTok Effect House | Free | Real-time preview on device requires a compatible phone; some advanced nodes are locked behind a partner program | Creator Marketplace fees (30% commission on brand deals) |
| WebAR Builders (8th Wall, ZapWorks) | Free tier limited to 1-2 experiences | Bandwidth and hosting costs beyond free quota | Plans start at $30/mo for 5 experiences |
Notice a pattern? Free tiers act as a demo. To scale, you almost always need a paid plan. And the free tiers often have watermarks or branding restrictions that make your effect look unprofessional.
The Cost of Rejection
One of the most frustrating hidden costs is the time and emotional energy spent on rejected effects. Platforms enforce strict guidelines around facial tracking accuracy, performance, and content policy. If your effect is rejected, you must fix the issue and resubmit. Each resubmission costs you hours.
A creator I know had a simple Instagram filter rejected seven times before it was approved. The back and forth took three weeks. During that time, she lost a client contract because the filter was supposed to launch alongside a product release. Free tool? Yes. Expensive? Absolutely.
For tips on avoiding common rejection reasons, read Why Your Instagram Filter Keeps Getting Rejected and How to Fix It.
Data Privacy: You Are the Product
When a tool is free, you are often the product. Free AR platforms collect massive amounts of data: face mesh data, usage patterns, location, device information, and even the content of user interactions. This data is used to train their AI models or sold to third parties.
For a brand campaign, this raises serious concerns. If your client’s users have their facial data captured by a third-party platform, you need to disclose that in your privacy policy. Legal compliance with state laws (like California’s CCPA or the upcoming federal privacy framework) can require a lawyer’s review. That is a hidden cost that can run into thousands of dollars.
Worse Case: Data Breach
A free platform that stores user data becomes a target for hackers. In 2025, a popular AR platform suffered a breach that exposed face maps and user IDs. Affected creators faced reputational damage and potential lawsuits. The free tool cost nothing, but the recovery bill was enormous.
Opportunity Cost: What You Are Not Building
When you spend weeks wrestling with a free tool’s limitations, you are not building a portfolio. You are not networking with brands. You are not learning skills that transfer to higher paying work. The time you invest in a free tool might be better spent learning a professional-grade AR engine like Unity or Unreal Engine, where you can command $100+ per hour as a contractor.
“Free tools teach you the platform. Paid tools teach you the craft. Focus on skills that let you work across any platform.” — Alex Chen, AR developer and founder of Immersive Studio
Hidden Costs in Collaboration and Version Control
Most free AR tools offer basic project management, but they lack proper version control, team collaboration features, or asset libraries. If you work with a team, you will need to set up shared drives, track changes manually, and resolve conflicts. This inefficiency adds hours to every project. Some creators resort to third-party tools like GitHub or Notion, which come with their own subscription costs.
How to Estimate the True Cost Before You Start
Before you commit to a free AR tool, run through this simple checklist:
- Asset budget: List all 3D models, textures, sounds, and animations you need. Add up their purchase price or your time to create them.
- Software extras: Identify any plugins, scripts, or additional apps required (e.g., Blender, Photoshop, a paid video editor).
- Testing devices: Do you have the latest iPhone or Android phone to test effects? If not, you may need to borrow or buy one. A used iPhone 13 costs roughly $300.
- Hosting and bandwidth: For WebAR, free tiers often cap the number of views. Calculate potential overage fees.
- Legal review: If the effect collects data, factor in a lawyer’s consultation fee (typically $200 to $500).
- Time valuation: Estimate how many hours you will spend learning and building. Multiply by your desired hourly rate.
Add those up. Compare to a paid AR platform that bundles assets, support, and hosting. Sometimes the paid option is cheaper.
The Real Price of “Free” Summarized
Here is a bulleted list of the most common hidden costs I see among AR creators:
- Hundreds of hours of unpaid learning and debugging
- Purchasing custom 3D assets and textures
- Platform subscription upgrades to remove limits
- Fees for advanced analytics or cloud resources
- Legal and privacy compliance costs
- Revenue share or commission cuts on branded effects
- Lost client work due to rejection delays
- Hardware upgrades to meet testing requirements
Planning Smarter for Your First Effect
Now that you know what to watch for, you can approach free AR tools with open eyes. Start with a very small project to test the waters. Use the free assets, but plan to replace them later. Set a strict time budget and stick to it. And consider whether a paid tool like Lens Studio Pro or a WebAR builder with a free trial might actually save you money in the long run.
If you are creating for fun, free tools are fantastic. But if you are building for clients or your own brand, treat the “free” label as an invitation to double-check your budget. The creators who succeed in AR are not the ones who find the cheapest software; they are the ones who understand the full cost of bringing an idea to life.
For more hands-on guidance, check out What Equipment Do You Actually Need to Start Creating AR Filters? and How to Choose AR Software Based on Your Skill Level.
Navigating Free and Paid in the Same Workflow
Many advanced creators use a hybrid approach. They prototype for free on Effect House or Lens Studio, then migrate the final project to a paid WebAR platform for client delivery. This strategy saves money during experimentation while ensuring production quality for paying customers. The key is knowing when to switch. Build your first few effects for free, learn the ropes, and once you land a real project, invest in the tools that make you efficient.
The hidden costs of free AR tools are not deal breakers. They are just expensive surprises if you ignore them. Know them, plan for them, and you will build better effects without the budget shock.