Creating your first Snapchat lens with 3D objects feels like magic. You see a virtual hat floating on your friend’s head, a dancing character in your living room, or a branded product that users can interact with. The best part? You don’t need a computer science degree to make it happen. Lens Studio makes the process accessible to anyone willing to spend an afternoon learning the basics.
Adding 3D objects to Snapchat lenses involves downloading Lens Studio, importing your 3D model in OBJ or FBX format, positioning it using face or world tracking, adjusting materials and lighting, and testing the lens on your device. Beginners can start with free templates and pre-made assets, then progress to custom models. Most creators build their first functional lens within two hours.
Getting Lens Studio set up on your computer
Lens Studio is Snapchat’s free desktop software for building AR experiences. It works on both Mac and Windows.
Head to the official Lens Studio website and download the latest version. The file size runs about 500MB, so the download takes a few minutes on most connections.
Install the software like any other program. You’ll need to create a Snapchat account if you don’t already have one. This account lets you publish lenses later and test them on your phone.
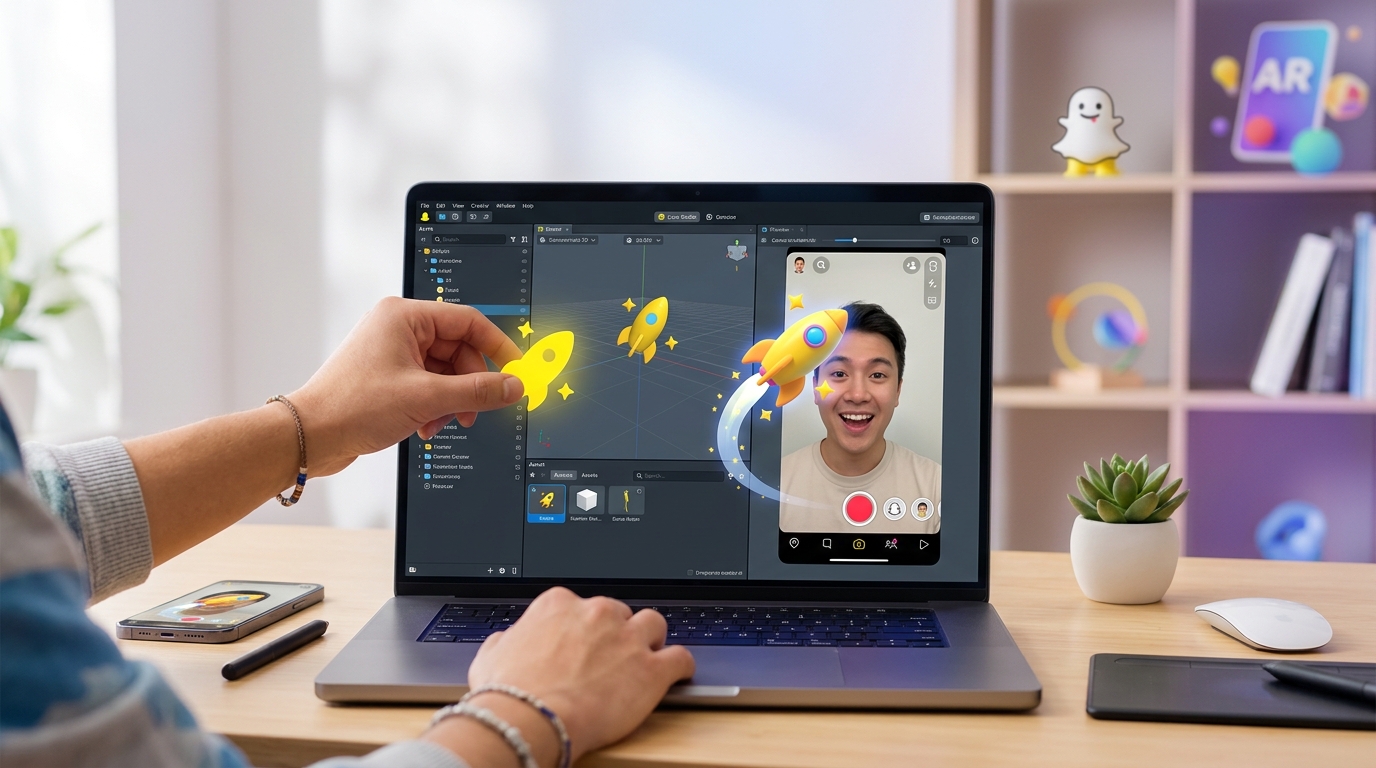
When you first open Lens Studio, you’ll see a welcome screen with template options. Don’t worry about choosing the perfect template right now. You can always start fresh or switch templates later.
The interface looks similar to other 3D software. The main viewport shows your scene. The left panel contains your scene hierarchy. The right panel displays properties for whatever you’ve selected. The bottom panel holds your resources like 3D models, textures, and scripts.
Take five minutes to click around. Rotate the viewport. Select different objects in the scene hierarchy. Getting comfortable with the layout saves frustration later.
Finding or creating 3D models for your lens
You need a 3D model before you can add it to your lens. You have three main options.
First, you can use free models from sites like Sketchfab, TurboSquid, or Google Poly archives. Search for models tagged as free for commercial use. Download files in OBJ or FBX format, which Lens Studio accepts.
Second, you can create your own models using free software like Blender. This takes more time but gives you complete creative control. A simple object like a hat or sunglasses makes a good first project.
Third, you can commission a 3D artist if you have a specific vision and a budget. Platforms like Fiverr or Upwork connect you with freelancers who specialize in AR-ready models.
For your first lens, stick with simple models. A complex character with thousands of polygons will slow down your lens and frustrate users. Aim for models under 10,000 triangles.
Check that your model has proper UV mapping if you want to apply textures. Models without UVs will appear as solid colors only.
Importing your 3D object into Lens Studio
Once you have your model file, adding it to Lens Studio takes just a few clicks.
- Open your Lens Studio project or create a new one from a blank template.
- Go to the Resources panel at the bottom of the screen.
- Click the plus icon or right-click in the panel and select “Import Files.”
- Navigate to your 3D model file and select it.
- Lens Studio will process the file and add it to your resources.
You’ll see the model appear in your Resources panel. It might come with associated textures or materials if those were embedded in the file.
Now you need to add the model to your actual scene. Drag the model from the Resources panel into the Objects panel on the left. Alternatively, drag it directly into the viewport.
The model appears in your scene. It might be huge or tiny depending on how it was exported. Don’t panic. You’ll adjust the size in the next step.
If your model doesn’t appear at all, check the console at the bottom for error messages. Common issues include unsupported file formats or corrupted exports. Re-export your model and try again.
Positioning and scaling your 3D object correctly

Your imported model probably needs adjustments. Size, position, and rotation all matter for creating a convincing AR effect.
Select your 3D object in the Objects panel. Look at the Inspector panel on the right. You’ll see Transform properties including Position, Rotation, and Scale.
Start with scale. If your object is a hat meant to sit on someone’s head, it needs to match realistic proportions. Adjust the X, Y, and Z scale values. Keep them equal for most objects to avoid distortion.
Use the viewport tools to position your object. The move tool (arrow icon) lets you drag the object around. The rotate tool (circular arrow) lets you spin it. The scale tool (box icon) provides another way to resize.
For face tracking effects, you’ll want to parent your object to a face landmark. Find “Face Mesh” or “Head” in your Objects panel. Drag your 3D object onto it to create a parent-child relationship. Now your object follows the user’s face movements.
For world tracking effects, position your object relative to the camera. Test different placements to see what feels natural. A virtual pet might sit on the ground. A floating logo might hover at eye level.
Position your 3D objects where users naturally expect them. A pair of sunglasses should align with the eyes, not float above the forehead. Test your lens on different face shapes to ensure proper placement across diverse users.
Applying materials and textures to your model
Materials determine how your 3D object looks. They control color, shininess, transparency, and how light interacts with the surface.
Select your 3D object and look at the Materials section in the Inspector panel. Lens Studio automatically creates a material when you import a model.
Click on the material to see its properties. You can adjust the base color, add textures, control metallic and roughness values, and set opacity.
To add a texture, click the plus icon next to Base Texture. Import an image file from your computer. Common formats include PNG, JPG, and TGA.
The texture wraps around your 3D model based on its UV mapping. If the texture looks stretched or wrong, the issue lies with the UV map, not Lens Studio.
Experiment with different material types. The PBR (Physically Based Rendering) material gives realistic results. The Unlit material ignores lighting and shows flat colors. The Flat material works well for cartoon styles.
Adjust the roughness value to control shininess. Low values create glossy, reflective surfaces. High values create matte, dull surfaces. A value around 0.5 works for most objects.
If you want transparency, reduce the opacity value. This works great for ghost effects or glass objects.
Setting up tracking for face or world effects
Tracking determines how your 3D object behaves in the AR space. Face tracking attaches objects to facial features. World tracking places objects in the environment.
For face tracking, you already parented your object to the face mesh. But you can get more specific. Lens Studio provides attachment points for nose, forehead, eyes, mouth, and more.
Find these attachment points in the Objects panel under Face Mesh. Drag your object onto the specific point you want. A hat goes on the head attachment. Glasses go on the face center attachment. Earrings go on the left and right ear attachments.
For world tracking, you need to add a Surface component. Create a new object in your scene. Add a Surface Tracker component from the Inspector panel. This lets users tap to place your 3D object on flat surfaces like tables or floors.
You can also use image tracking to anchor objects to specific pictures. Add an Image Marker component and upload a target image. When users point their camera at that image, your 3D object appears.
Test different tracking modes to see what fits your lens concept. Face tracking works great for accessories and makeup. World tracking suits furniture preview or character placement. Image tracking excels for branded experiences tied to products or posters.
Adding lighting and shadows for realism
Proper lighting makes your 3D objects look like they belong in the scene. Without it, objects appear flat and fake.
Lens Studio includes several light types. The default setup usually includes an ambient light and a directional light.
Select the directional light in your Objects panel. Adjust its rotation to change where shadows fall. Adjust its intensity to make lighting brighter or dimmer.
Add additional lights if needed. Right-click in the Objects panel and select “Add New,” then choose from point light, directional light, or ambient light.
Point lights work like light bulbs, illuminating objects near them. Directional lights simulate sunlight, casting parallel shadows. Ambient lights provide general illumination without specific direction.
For face tracking lenses, you want lighting that adapts to the environment. Enable “Environment Light” in your scene settings. This analyzes the real-world lighting and adjusts your 3D object to match.
Shadows add depth and grounding. Enable shadow casting on your directional light. Enable shadow receiving on the ground plane or surface where your object sits.
Be careful not to overdo lighting. Too many lights tank performance on older phones. Stick with two or three lights maximum for most lenses.
Testing your lens on an actual device
The viewport preview helps during creation, but real device testing reveals the truth. Colors look different. Performance varies. Tracking behaves differently.
Connect your phone to the same WiFi network as your computer. Open Snapchat on your phone.
In Lens Studio, click the “Pair” button in the top right corner. A QR code appears. Scan it with Snapchat. Your phone connects to Lens Studio.
Now when you click “Push to Device,” your current lens loads in Snapchat. You can test it in real time with actual face tracking or world tracking.
Walk around. Try different lighting conditions. Test with friends who have different face shapes. See how the lens performs outdoors versus indoors.
Watch for performance issues. If the lens stutters or lags, you need to optimize. Reduce polygon counts. Lower texture resolutions. Remove unnecessary lights or effects.
Pay attention to tracking accuracy. Does your object stay attached to the face properly? Does it jitter or float away? Adjust parent relationships or tracking settings to fix issues.
Testing reveals bugs you’d never catch in the viewport. A hat might look perfect on your computer but clip through hair on real users. An object might be too big or too small in actual use.
Common mistakes and how to avoid them
| Mistake | Why It Happens | How to Fix |
|---|---|---|
| Object too large or small | Wrong export scale from 3D software | Adjust scale values in Transform properties |
| Texture appears black | Missing or incorrectly linked texture file | Re-import texture and assign to material |
| Lens runs slowly | Too many polygons or complex materials | Optimize model geometry and reduce texture sizes |
| Object doesn’t follow face | Not parented to face mesh | Drag object onto Face Mesh in Objects panel |
| Shadows look wrong | Incorrect light direction | Rotate directional light and test shadow angle |
New creators often skip optimization. They import high-resolution models with 4K textures and wonder why the lens crashes. Mobile devices have limited memory and processing power. Keep models under 10,000 triangles. Keep textures under 2048×2048 pixels.
Another common mistake is ignoring the approval guidelines. Snapchat rejects lenses that violate their policies. Read the guidelines before you publish to avoid wasted time.
Many beginners also forget to test on multiple devices. A lens that works perfectly on an iPhone 14 might struggle on an Android phone from three years ago. Test on at least two different devices before publishing.
Publishing your lens to Snapchat
Once testing confirms everything works, you’re ready to publish.
Click “Publish Lens” in the top right corner of Lens Studio. A form appears asking for lens details.
Add a name for your lens. This appears when users browse lenses, so make it descriptive and catchy.
Write a description explaining what your lens does. Keep it under 250 characters.
Add preview images and videos. These show potential users what your lens looks like. Capture screenshots during device testing.
Choose categories that fit your lens. This helps users find it through search and browse features.
Review Snapchat’s community guidelines one more time. Make sure your lens doesn’t violate any policies.
Submit your lens for review. Snapchat typically reviews lenses within 24 to 48 hours. You’ll receive an email when it’s approved or if changes are needed.
After approval, your lens goes live. Share the Snapcode or link with friends. Track usage statistics in the Lens Studio dashboard.
If you’re building lenses for clients or marketing campaigns, check out resources on monetizing your AR skills to turn this hobby into income.
Improving your skills beyond the basics
Your first lens won’t be perfect. That’s expected. Every creator starts somewhere.
Study successful lenses to see what works. Notice how objects are positioned. Pay attention to subtle animations. Observe how lighting creates mood.
Templates save hours of design time while you’re learning. They provide working examples you can modify and learn from.
Practice with different 3D objects. Try creating a simple accessory lens, then a world effect, then something with animation. Each project teaches new techniques.
Join the Lens Studio community. Forums and Discord servers connect you with other creators. Ask questions. Share your work. Get feedback.
Learn basic 3D modeling if you haven’t already. Understanding how models are built helps you optimize them for AR. Free tools rival premium software for learning.
Experiment with scripting once you’re comfortable with the visual tools. JavaScript in Lens Studio opens up interactive features and complex behaviors.
Compare different platforms to understand their strengths. Meta Spark Studio versus Lens Studio each excel at different things.
Building lenses that people actually use
Technical skills matter, but understanding your audience matters more. A perfectly executed lens that nobody wants to use is just a portfolio piece.
Think about what makes people share lenses. Humor works. Transformation works. Utility works. Vanity works. Figure out which angle fits your concept.
Keep interactions simple. Users should understand your lens in three seconds. Complicated instructions or hidden features reduce usage.
Test with people outside your friend group. They’ll interact with your lens differently than you expect. Their confusion reveals design flaws.
Study face tracking effects that go viral to understand what resonates with users. Patterns emerge across successful lenses.
Consider timing and trends. Holiday lenses perform well during their season. Trend-based lenses need to launch while the trend is hot.
Brand partnerships offer another path. Companies pay creators to build custom lenses. Understanding what makes brand campaigns successful helps you pitch better ideas.
Your first 3D lens is closer than you think
You’ve learned how to import 3D objects, position them with tracking, apply materials, set up lighting, and publish to Snapchat. That’s everything you need to create a functional AR lens.
Your first attempt might feel clunky. The object might not sit quite right. The lighting might look off. That’s part of the learning process.
Start simple. Build a basic accessory lens with one 3D object. Get it working. Publish it. Then build something slightly more complex.
Each lens you create teaches you something new. You’ll develop an intuition for what works and what doesn’t. You’ll get faster at troubleshooting. You’ll spot optimization opportunities earlier.
The AR creation community welcomes beginners. Other creators remember struggling with their first imports and tracking issues. They’re happy to help when you get stuck.
Download Lens Studio today. Import a simple 3D model. Follow these steps. Test on your phone. You’ll have a working Snapchat lens by this evening.