You’ve built your first Instagram filter in Meta Spark Studio. It looks amazing. Now comes the part that trips up most creators: getting it published and approved.
The submission process isn’t complicated, but Instagram’s review team rejects thousands of filters every week for avoidable mistakes. Miss one checkbox or ignore a policy detail, and you’ll wait days only to start over.
This guide walks you through every step of publishing your Instagram filter, from preparing your files to navigating the approval process. You’ll learn exactly what Instagram’s review team checks, how to avoid common rejection reasons, and what to do if your filter doesn’t pass on the first try.
Publishing an Instagram filter requires submitting through Meta Spark Hub, meeting technical requirements, following community guidelines, and passing a review that typically takes 3 to 5 business days. Success depends on proper file preparation, clear documentation, accurate metadata, and compliance with Instagram’s policies on branding, user safety, and content standards. Most rejections happen due to performance issues or policy violations that creators can fix before resubmission.
Before You Hit Submit
Your filter works perfectly in the preview window. That’s great, but Instagram’s review team evaluates dozens of criteria you might not have considered.
Start by testing your filter on actual devices. The preview window doesn’t always reveal performance problems that appear on older phones. Open Instagram, test your filter through the app, and watch for lag, crashes, or visual glitches.
Record a few test videos. Instagram requires at least one demo video showing your filter in action. This video helps reviewers understand what your filter does and proves it works as intended.
Check your filter’s file size. Instagram has technical limits, and oversized filters get rejected automatically. Keep your total package under 4MB for optimal approval chances. Compress textures, optimize 3D models, and remove unused assets.
Review Instagram’s effect policies carefully. These rules cover everything from prohibited content to required disclosures. One policy violation means automatic rejection, no exceptions.
“Most filter rejections happen in the first 24 hours of review. The automated checks catch technical problems immediately, while policy violations surface when human reviewers examine your effect.” – Meta Spark Community Guidelines
Setting Up Your Meta Spark Hub Account
You can’t publish filters without a Meta Spark Hub account. This platform handles all submissions, tracks review status, and manages your published effects.
Visit the Meta Spark Hub website and sign in with your Facebook or Instagram account. You’ll need to verify your identity and agree to Meta’s creator terms.
Complete your profile information. Add a profile photo, write a bio, and link your Instagram account. Reviewers sometimes check creator profiles during the approval process, especially for branded filters or effects that might need additional verification.
Enable two-factor authentication on your account. This extra security step protects your published filters and prevents unauthorized access to your creator dashboard.
Familiarize yourself with the dashboard layout. You’ll spend time here checking submission status, reading rejection reasons, and managing your published effects. The interface shows pending reviews, approval notifications, and performance metrics for live filters.
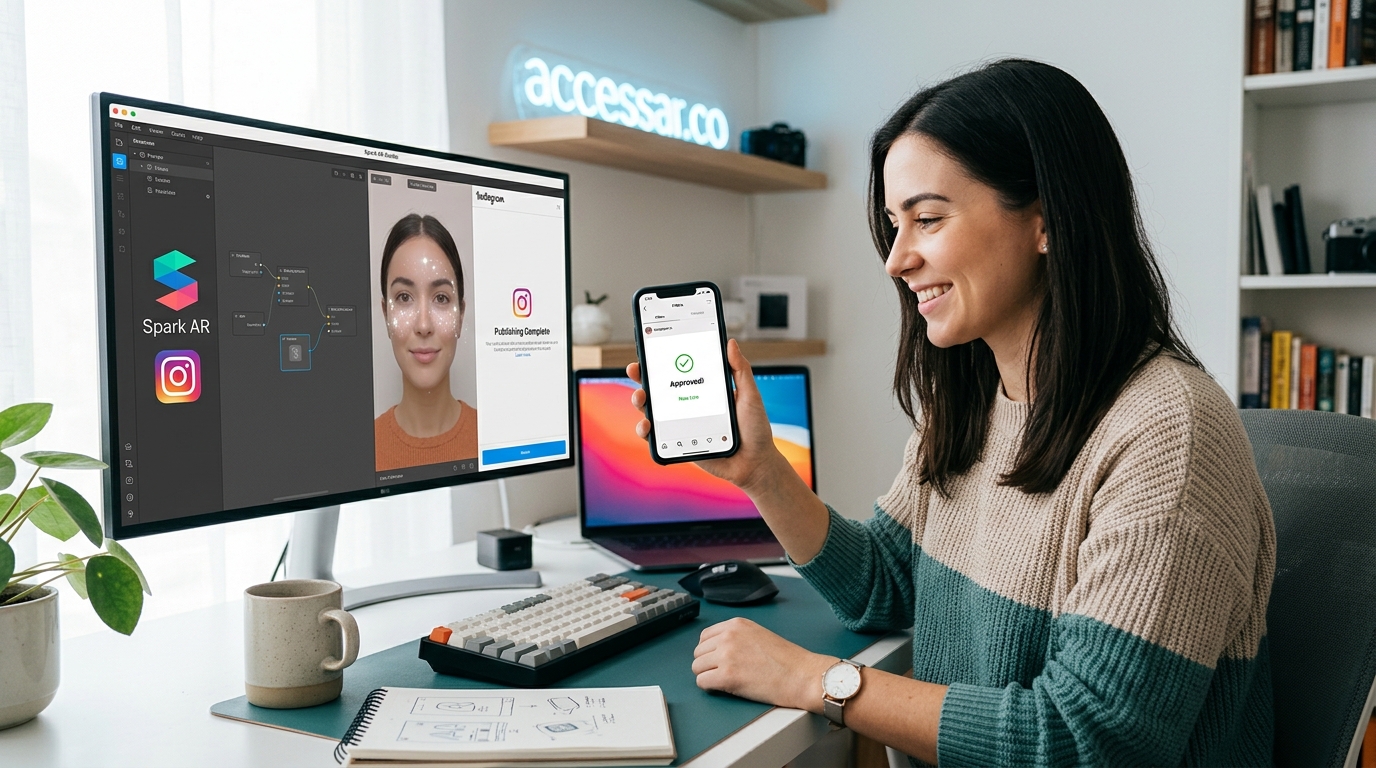
Step-by-Step Publishing Process
Here’s exactly how to publish your Instagram filter from Meta Spark Studio to the app.
- Open your completed filter project in Meta Spark Studio.
- Click the “Upload and Export” button in the bottom left corner.
- Select “Upload” from the menu options.
- Choose “Instagram” as your target platform (not Facebook).
- Fill in the required metadata fields in the upload window.
- Add your demo video showing the filter in action.
- Include at least one preview icon image (the thumbnail users see).
- Write a clear, descriptive effect name and description.
- Select appropriate categories and tags for discoverability.
- Review all information for accuracy and completeness.
- Check the box confirming you’ve read the policies.
- Click “Submit for Review” to send your filter to Instagram’s team.
The system uploads your files and generates a submission confirmation. You’ll receive an email acknowledging your submission within a few minutes.
What Instagram’s Review Team Actually Checks
Instagram evaluates every filter against technical standards and community policies. Understanding these criteria helps you avoid rejection.
Technical Requirements
- File size stays under platform limits
- Filter runs smoothly on supported devices
- No crashes, freezes, or performance issues
- Assets load correctly without errors
- Audio (if included) plays without distortion
- Instructions appear clearly if needed
Policy Compliance
- No copyrighted content without permission
- No misleading or deceptive effects
- No promotion of harmful behaviors
- No inappropriate or offensive content
- Proper disclosures for branded content
- No collection of user data without consent
User Experience
- Effect works as described in metadata
- Instructions are clear and easy to follow
- Visual quality meets Instagram’s standards
- Effect provides value to users
- No excessive branding or advertising
- Appropriate for Instagram’s audience
| Approval Factor | What Gets Approved | What Gets Rejected |
|---|---|---|
| Performance | Runs smoothly on iPhone 8 and newer | Lags, crashes, or freezes |
| Content | Original designs, licensed assets | Copyrighted material, offensive imagery |
| Branding | Subtle logos, clear disclosures | Heavy advertising, misleading claims |
| Functionality | Works as described, clear purpose | Broken features, confusing interface |
| File Size | Under 4MB optimized | Oversized, uncompressed assets |
Similar platforms have their own approval processes. If you’re interested in creating effects for other apps, check out resources on building filters without coding skills or explore templates that speed up design time.
Writing Metadata That Gets Approved
Your filter’s name, description, and tags matter more than you think. Poor metadata causes rejections even when the filter itself works perfectly.
Choose a descriptive, searchable name. “Sparkle Eyes” works better than “Effect 1” or “Cool Filter.” Users should understand what your filter does from the name alone.
Write a clear description that explains the effect. Mention any interactive elements, special features, or instructions users need to know. Keep it under 150 characters for best results.
Select accurate categories. Instagram uses these to organize filters and help users find effects they’ll enjoy. Choosing wrong categories can trigger rejection or limit your filter’s reach.
Add relevant tags that describe your effect. Think about what users might search for when looking for filters like yours. Include style descriptors, use cases, and key features.
Avoid promotional language in your metadata. Don’t include phrases like “best filter ever” or “you need this.” Stick to factual descriptions of what your filter does.
Common Rejection Reasons and How to Fix Them
Most filters get rejected at least once. Here’s what usually goes wrong and how to fix it.
Performance Issues
Your filter runs slowly or crashes on test devices. Solution: Reduce particle counts, compress textures, simplify 3D models, or remove complex animations.
Policy Violations
Your filter contains copyrighted content, inappropriate imagery, or misleading elements. Solution: Replace copyrighted assets with original designs or licensed content, remove offensive elements, and ensure your effect works as described.
Technical Errors
Assets fail to load, audio doesn’t play, or instructions don’t appear. Solution: Test thoroughly in Meta Spark Studio, check all asset paths, verify audio file formats, and ensure instruction patches work correctly.
Metadata Problems
Your name, description, or tags violate guidelines or mislead users. Solution: Rewrite metadata to accurately describe your filter without promotional language, fix spelling errors, and select appropriate categories.
Missing Documentation
You didn’t include required demo videos or preview images. Solution: Record a clear video showing your filter in action, create an attractive preview icon, and ensure all required files upload successfully.
When you receive a rejection, Instagram sends an email explaining the specific issue. Read this carefully. The rejection reason tells you exactly what to fix before resubmitting.
After Submission
Instagram typically reviews filters within 3 to 5 business days. Sometimes it’s faster, occasionally slower during high-volume periods.
You’ll receive an email when review completes. Approved filters go live immediately and appear in your Instagram profile’s effects gallery. Users can find and use your filter right away.
Rejected filters come with explanations. Read the rejection reason, fix the identified issues, and resubmit. There’s no limit on resubmissions, but each attempt goes through the full review process again.
Monitor your filter’s performance after approval. Meta Spark Hub shows impression counts, usage statistics, and user engagement metrics. This data helps you understand what works and informs future filter designs.
Update your filter if needed. You can submit new versions that fix bugs, improve performance, or add features. Updates go through the same review process as initial submissions.
For inspiration on what types of filters perform well, browse examples of viral Instagram AR filter ideas or see how brands use effects in campaigns like Nike’s AR sneaker try-on experience.
Preparing for Branded Content Review
Branded filters face additional scrutiny. If your filter promotes a business, product, or service, Instagram applies stricter review standards.
Clearly disclose brand partnerships in your metadata. Instagram requires transparency about commercial relationships. Include brand names in your effect description and follow branded content guidelines.
Ensure you have permission to use brand assets. Logos, product images, and trademarked elements need proper authorization. Instagram may request proof of permission during review.
Avoid excessive advertising. Branded filters should provide entertainment value, not just promote products. The effect needs to be fun or useful for users beyond the brand message.
Follow specific industry regulations. Filters related to alcohol, gambling, financial services, or healthcare face additional restrictions. Check Instagram’s policies for your specific industry before submitting.
Consider using no-code AR platforms if you’re creating branded content without technical skills, or learn about equipment you actually need to produce professional results.
Maximizing Your Filter’s Reach After Approval
Getting approved is just the beginning. Making your filter successful requires promotion and engagement.
Share your filter on Instagram Stories immediately after approval. Tag friends, use relevant hashtags, and encourage followers to try it. The first 48 hours after launch are critical for building momentum.
Create content featuring your filter. Post photos and videos that showcase what makes your effect special. Show different use cases and creative applications.
Engage with users who try your filter. Like and comment on posts that feature your effect. This builds community and encourages more people to use it.
Cross-promote on other platforms. Share your Instagram filter on TikTok, Twitter, or Facebook. Link to your effect in your bio and other social profiles.
Collaborate with other creators. Partner with influencers or friends who can introduce your filter to new audiences. User-generated content drives filter discovery more than any other factor.
If you’re also creating effects for other platforms, check out guides for making your first Snapchat lens or explore viral TikTok effect trends to expand your reach across multiple apps.
Handling Resubmissions and Appeals
Sometimes filters get rejected even when you’ve followed all the rules. Here’s how to handle it.
Read rejection emails completely. Instagram explains exactly what went wrong. Don’t skip this step and guess at the problem.
Fix only the identified issues. Don’t rebuild your entire filter unless necessary. Address the specific rejection reason and resubmit.
Test your fixes thoroughly before resubmitting. Make sure your changes actually solve the problem. Another rejection delays your launch even more.
Document your changes in the submission notes. Explain what you fixed and why your filter now complies with policies. This helps reviewers understand your updates.
Contact Meta support if rejection reasons seem unclear or incorrect. Sometimes reviewers make mistakes or automated systems flag false positives. Polite, detailed appeals can overturn incorrect rejections.
Be patient with the process. Each submission takes time to review. Rushing or submitting multiple versions simultaneously creates confusion and delays approval.
Understanding Instagram’s Evolving Policies
Instagram regularly updates its filter policies and technical requirements. Staying informed prevents future rejections and keeps your published filters compliant.
Follow Meta Spark’s official blog and social channels. Policy changes get announced here first. Subscribe to notifications so you don’t miss important updates.
Join creator communities and forums. Other filter makers share experiences, policy interpretations, and approval tips. These communities often spot policy changes before official announcements.
Review your published filters periodically. Instagram can remove filters that violate new policies, even if they were approved under old rules. Proactive updates prevent sudden removals.
Attend Meta Spark workshops and webinars. These events provide direct access to Meta’s team and early information about platform changes.
Keep learning about AR development trends. Platforms like Instagram continue evolving their capabilities. Understanding where the technology is heading helps you create filters that remain relevant and compliant.
For broader context on AR’s direction, explore topics like WebAR’s role in mobile shopping to see how augmented reality is expanding beyond social filters.
Building Your Filter Portfolio
One approved filter is great. A portfolio of successful effects establishes you as a serious creator.
Start with simple effects and gradually increase complexity. Each successful submission teaches you more about what works and what Instagram approves.
Experiment with different filter types. Try face effects, world effects, interactive games, and utility filters. Variety demonstrates your range and helps you find your creative niche.
Track what performs well. Pay attention to which filters get the most impressions and usage. Double down on styles and concepts that resonate with users.
Iterate on successful concepts. If one filter performs well, create variations or improved versions. Build on what works rather than constantly starting from scratch.
Learn from rejections. Every rejection teaches you something about Instagram’s standards. Apply those lessons to future projects.
Stay consistent with your submissions. Regular uploads keep your profile active and help you build an audience. Aim for at least one new filter per month.
Developing skills in related areas helps too. Understanding face tracking effects or studying successful campaigns broadens your creative toolkit and improves your Instagram filters.
Your Filter Is Ready for the World
Publishing your first Instagram filter feels intimidating until you’ve done it once. After that first approval, the process becomes routine.
Remember that rejection isn’t failure. Nearly every successful filter creator has faced rejections. Each one teaches you something that makes your next submission stronger.
Start with the basics: test thoroughly, follow policies carefully, and write clear metadata. These fundamentals prevent most rejections and set you up for approval.
Your filter represents your creativity and technical skills. Getting it approved and into users’ hands is worth the effort. Take your time, do it right, and watch people around the world use the effect you created.
Now go back to Meta Spark Hub and hit that submit button. Your filter deserves to be seen.